KT 板入门教练机
完整制作教程
KT Foam Beginner Trainer
Complete Build Guide
高翼教练机是RC飞行爱好者最理想的入门机型。宽大的机翼提供了出色的稳定性,高翼布局让飞机具有自然的抗侧翻能力,即使操控失误也能较快恢复。本教程将带您一步一步完成这架经典机型的制作。 The high-wing trainer is the ideal first RC plane for beginners. Its wide wings provide excellent stability, and the high-wing layout gives natural self-righting tendency — even if you make a control mistake, it recovers easily. This tutorial walks you through building this classic design step by step.
📋 材料清单📋 Materials List
- KT板 5mm × 2张(A1尺寸)KT foam 5mm × 2 sheets (A1 size)
- 无刷电机 1200KVBrushless motor 1200KV
- 电调 ESC 20AESC 20A
- 舵机 9g × 3个9g servo × 3
- 螺旋桨 6×4英寸Propeller 6×4 inch
- 锂电池 3S 1300mAhLiPo battery 3S 1300mAh
- 竹签 / 碳纤维管若干Bamboo/carbon rods
- 热熔胶、CA胶Hot glue, CA glue
打印裁切图纸Print and Cut Templates
准备工作 · 约30分钟Preparation · ~30 min
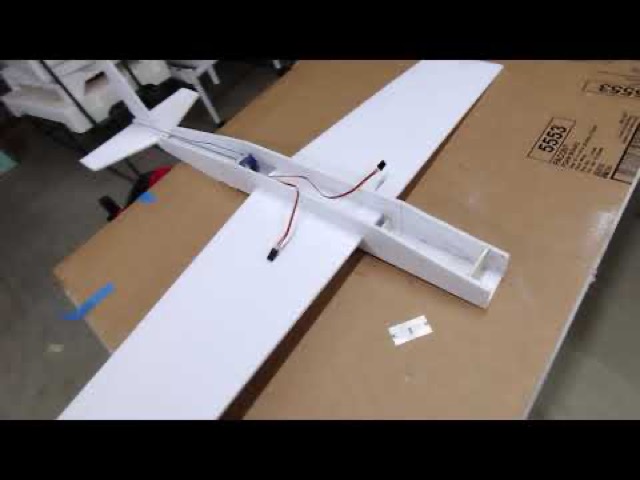
首先按照机型比例打印翼型图纸(建议1:1打印),将图纸用胶带固定在KT板上,用美工刀沿轮廓线仔细裁切。建议准备以下部件图纸:First print the airfoil templates at 1:1 scale, tape them to the KT foam board, and carefully cut along the outlines with a utility knife. Prepare templates for these parts:
- 主翼(左右对称两片)翼展约800mmMain wing (2 symmetric halves), ~800mm span
- 机身侧板(左右各一片)Fuselage side panels (one each side)
- 水平尾翼与垂直尾翼Horizontal and vertical stabilizers
- 舵面:升降舵、副翼(各2片)、方向舵Control surfaces: elevator, ailerons (×2), rudder
💡 小贴士💡 Tip
裁切时保持美工刀垂直于板面,一刀切断,避免来回锯割导致边缘粗糙。使用金属直尺辅助切割直线,确保翼型精准。Keep the knife perpendicular to the foam surface and cut in one stroke to avoid rough edges. Use a metal ruler for straight cuts to ensure accurate airfoil shapes.
机翼折叠与加强Wing Folding and Reinforcement
结构制作 · 约45分钟Structure · ~45 min
KT板机翼采用折叠工艺——用金属直尺和圆珠笔在KT板背面划出折线,然后弯折至设计角度。这样可以形成有厚度的翼型,增加强度和升力。KT foam wings use a folding technique — score the fold line on the back of the foam with a ballpoint pen, then fold to the design angle. This creates an airfoil profile that increases strength and lift.
- 在机翼内侧(折叠后的上方)划出折线,深度约为板材厚度的2/3Score the fold line on the wing's inner side to about 2/3 of the foam thickness
- 沿折线弯折至约15-20°翼型角度Fold along the score line to ~15-20° airfoil angle
- 用热熔胶或CA胶固定折叠位置Secure the fold with hot glue or CA glue
- 在机翼中心插入竹签或碳纤维管作为主翼梁Insert bamboo/carbon rod at wing center as main spar
机身制作Fuselage Construction
结构制作 · 约60分钟Structure · ~60 min
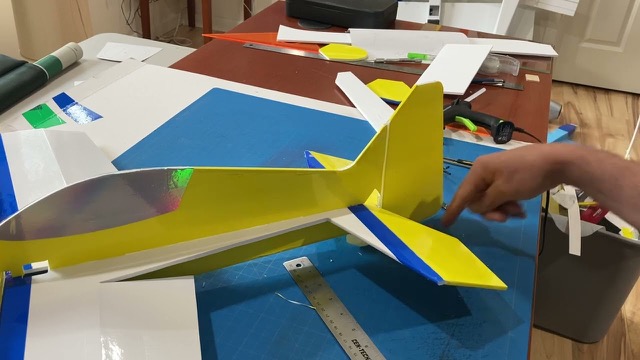
教练机机身采用盒型结构,由两片侧板和若干隔框组成,结构简单牢固。将两片机身侧板用CA胶粘合,注意保持左右对称,角度一致。The trainer fuselage uses a box structure made of two side panels and several formers — simple yet strong. Bond the two side panels with CA glue, keeping left-right symmetry and consistent angles.
- 裁切机身侧板及前、中、后三个隔框Cut fuselage side panels and front, middle, rear formers
- 将隔框垂直插入机身侧板间,用CA胶粘合Insert formers vertically between side panels and bond with CA glue
- 预留电机安装孔、舵机安装位Pre-cut motor mount hole and servo positions
- 加装机翼连接槽(机翼插入机身处)Add wing mounting slot where wing plugs into fuselage
舵面安装与连杆设置Control Surface and Linkage Setup
操控系统 · 约60分钟Control system · ~60 min
舵面是飞机操控的关键。用剪刀在翼面与舵面之间保留约1-2mm间隙,然后用宽胶带作为铰链连接,确保舵面能够顺畅偏转。Control surfaces are the key to aircraft control. Leave a 1-2mm gap between the wing and control surface, then use wide tape as a hinge to connect them, ensuring smooth deflection.
- 副翼:机翼后缘约30%处,偏转量±20mmAilerons: rear 30% of wing, ±20mm deflection
- 升降舵:水平尾翼后缘,偏转量±15mmElevator: rear of horizontal stabilizer, ±15mm deflection
- 方向舵:垂直尾翼后缘,偏转量±20mmRudder: rear of vertical stabilizer, ±20mm deflection
- 安装舵机,用连杆(竹签弯折或Z型钢丝)连接舵机臂与舵角Install servos, connect servo arm to control horn with pushrod (bent bamboo or Z-wire)
电子设备安装Electronics Installation
电子系统 · 约60分钟Electronics · ~60 min
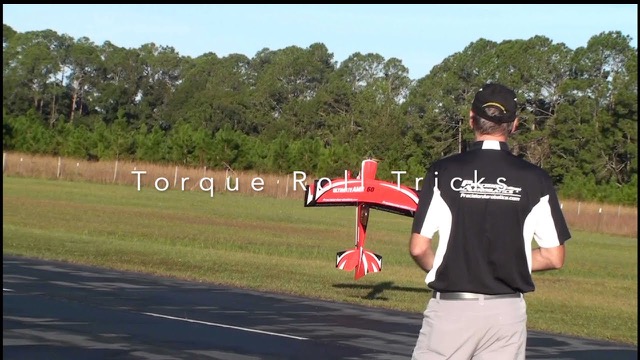
按照正确顺序安装电子设备,合理布局确保重心在设计范围内(通常为翼弦25-30%处)。Install electronics in the correct order, with layout ensuring the center of gravity falls within the designed range (typically 25-30% of chord).
- 先安装电机和防火墙(机头固定板)Install motor and firewall (nose mounting plate) first
- 电调用魔术贴固定在机身内侧,便于散热Mount ESC inside fuselage with Velcro, ensuring airflow for cooling
- 接收机放置在飞机中心重心位置附近Place receiver near the center of gravity
- 天线尽量朝向两侧,提升信号接收Route antennas outward on both sides for better signal reception
- 电池用魔术贴固定,位置可前后调节以调整重心Secure battery with Velcro, adjustable fore/aft to tune center of gravity
整机组装与调试Final Assembly and Tuning
调试完善 · 约45分钟Tuning · ~45 min
将机翼插入机身,连接所有舵机线,完成最终组装,然后进行全面的地面调试。Insert the wing into the fuselage, connect all servo leads, complete final assembly, then perform comprehensive ground testing.
- 检查所有舵面偏转方向是否正确Verify all control surfaces deflect in the correct direction
- 测量并调整重心至翼弦25-28%位置Measure and adjust CG to 25-28% of chord
- 设置遥控器端点行程,副翼±20mm、升降舵±15mmSet radio endpoints: aileron ±20mm, elevator ±15mm
- 低油门测试电机旋转方向,确认螺旋桨产生推力方向正确Low throttle test to check motor rotation and propeller thrust direction
⚠️ 安全提示⚠️ Safety Note
地面调试时务必摘下螺旋桨,防止意外伤人。接上电源后立即握持机体,防止飞机突然起飞。Always remove the propeller during ground testing to prevent injury. Hold the aircraft after connecting power in case it unexpectedly takes off.
涂装与首飞准备Paint and First Flight Prep
最终完善 · 约30分钟Final touches · ~30 min
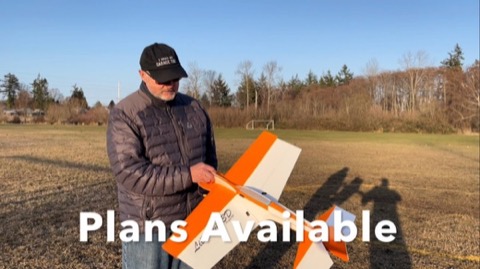
为飞机涂上颜色,不仅美观,还能提高空中辨识度,帮助判断飞机姿态。建议机翼上下面涂不同颜色,如机翼上面红色、下面白色,在任何飞行姿态下都能清楚判断方向。Paint the plane for looks and improved aerial identification to help judge orientation. Recommend different top/bottom colors, e.g. red on top, white below — you can clearly tell the aircraft's attitude in any maneuver.
- 用丙烯颜料或彩色胶带进行涂装Use acrylic paint or colored tape for decoration
- 机头建议涂鲜艳颜色提高辨识度Paint the nose a vivid color for better visibility
- 安装螺旋桨,检查螺旋桨是否有裂缝损伤Install propeller, check for cracks or damage
- 充满电池,进行最终飞前检查Charge battery fully, perform final pre-flight check
🎉 恭喜完成!🎉 Congratulations!
您的第一架KT板教练机已经完成!建议选择无风的清晨进行首飞,场地宽阔开阔。如需了解首飞技巧,请参阅入门指南。祝首飞顺利!Your first KT foam trainer is complete! Choose a windless morning for your maiden flight in a wide open area. For first-flight tips, see the Beginner Guide. Happy flying!