KT 板 3D 特技飞机
完整制作教程
KT Foam 3D Aerobatic Plane
Complete Build Guide
3D特技飞机代表了KT板制作的最高难度。超大舵面(副翼占后缘50%以上,升降舵和方向舵同样超大)配合高功率电机,赋予飞机极强的低速操控能力,可以实现垂直悬停(Hover)、哈里尔(Harrier)等令人叹为观止的3D飞行动作。制作这架飞机需要掌握高精度的结构制作技术和舵机调试经验。 A 3D aerobatic plane represents the pinnacle of KT foam building. Oversized control surfaces — ailerons covering 50%+ of the trailing edge, with equally massive elevator and rudder — combined with a high-power motor give the plane extraordinary low-speed authority for hovering, Harrier flight, and other jaw-dropping 3D maneuvers. Building one requires precision construction technique and servo tuning experience.
📋 材料清单📋 Materials List
- KT板 3mm × 3张(A1尺寸)— 3D机用更薄的板材减重KT foam 3mm × 3 sheets (A1) — thinner board for weight savings
- 无刷电机 2212 1400KV(高推力)Brushless motor 2212 1400KV (high thrust)
- 电调 ESC 40A(3D机电流峰值大)ESC 40A (3D flight has high current peaks)
- 大扭力舵机 MG90S × 4个High-torque servo MG90S × 4
- 螺旋桨 8×4.5英寸正反桨(3D用慢速大桨)Propeller 8×4.5 inch (3D uses slow large-diameter props)
- 锂电池 4S 1300mAh(高放电)LiPo battery 4S 1300mAh (high discharge rate)
- 碳纤维管 6mm × 600mm × 2根Carbon fiber tubes 6mm × 600mm × 2
- 碳纤维板 2mm(防火墙、加强片)Carbon fiber sheet 2mm (firewall, reinforcement)
- 超轻铝合金舵角 × 4套Lightweight alloy control horns × 4 sets
- CA胶(稀薄+中等)、热熔胶CA glue (thin + medium), hot glue
图纸与材料准备Templates and Material Preparation
准备工作 · 约40分钟Preparation · ~40 min
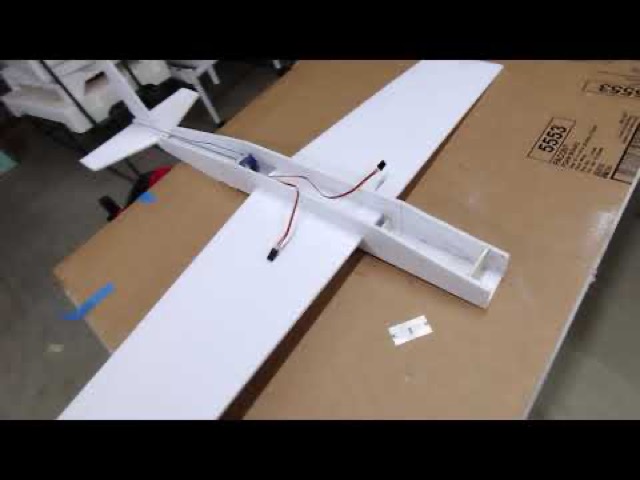
3D飞机的图纸设计必须把减重放在首位。翼展建议900-1000mm(翼载越低3D性能越好),机身采用开放式框架结构,所有非承力区域都要镂空减重。在动手制作前,仔细规划每个部件的尺寸和位置。3D aircraft design must prioritize weight reduction above all else. Aim for a 900–1000mm wingspan (lower wing loading = better 3D performance). The fuselage uses an open-frame skeleton, with all non-structural areas cut away. Plan every component's dimensions and position carefully before you start cutting.
- 机翼:翼展900mm,弦长200mm,副翼占后缘55%(110mm深度)Wing: 900mm span, 200mm chord, ailerons covering 55% of trailing edge (110mm deep)
- 机身:长约650mm,最宽处约60mm,采用蜂窝框架结构Fuselage: ~650mm long, ~60mm max width, honeycomb frame structure
- 水平尾翼:翼展约350mm,升降舵占后缘60%Horizontal tail: ~350mm span, elevator covering 60% of trailing edge
- 垂直尾翼:高度约200mm,方向舵占后缘55%Vertical tail: ~200mm height, rudder covering 55% of trailing edge
💡 3D机设计哲学💡 3D Design Philosophy
3D飞机的核心是"轻+大舵面+大推力"三要素。总重量目标控制在300-400g(含电池),推重比应达到2:1以上。每减少1g重量,3D性能的改善程度远大于1g的增加。在设计阶段就要对每个部件进行重量预算。The 3D aircraft formula is: light + big control surfaces + big thrust. Target an all-up weight of 300–400g including battery, with a thrust-to-weight ratio above 2:1. Every gram saved improves 3D performance more than any gram added elsewhere. Build a weight budget for every component during the design phase.
机翼裁切与折叠Wing Cutting and Folding
机翼制作 · 约60分钟Wing construction · ~60 min
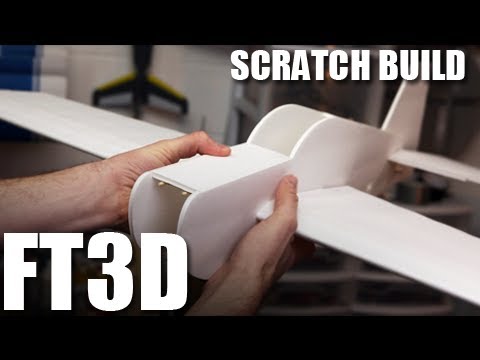
3D机的机翼比教练机薄(3mm KT板),折叠角度也更小,以形成接近平板的翼型。这种接近零拱度的翼型在大攻角下仍能产生升力,是3D机能够低速飞行的关键之一。A 3D wing is thinner (3mm KT foam) and folded to a flatter profile than a trainer wing. This near-zero-camber airfoil still generates lift at very high angles of attack — one key reason 3D planes can fly so slowly.
- 将机翼图纸贴于3mm KT板,精确裁切主翼轮廓和翼根连接槽Tape wing template to 3mm KT foam; precisely cut the wing outline and root mounting slot
- 折叠线位于翼弦25%处,深度划至板材厚度60%(3mm板约1.8mm)Score fold line at 25% chord, cutting to 60% of foam thickness (~1.8mm for 3mm board)
- 折叠角度约6-8°(比教练机的15-20°小得多)Fold angle ~6–8° (much flatter than a trainer's 15–20°)
- 副翼区域暂不折叠,保持平板待后续安装铰链Leave the aileron section unfolded for now — keep it flat for hinging later
- 用薄CA胶渗入折叠线固定,快速施压10秒即可固化Wick thin CA glue into the fold crease and press for 10 seconds to cure
- 在翼面后缘预留副翼铰链线,用刀背轻压出痕迹标记Mark the aileron hinge line on the trailing edge with a light knife-back score
大翼面副翼制作Oversized Aileron Construction
操控面制作 · 约50分钟Control surface · ~50 min
3D机副翼是整架飞机最具特色的设计——副翼深度达翼弦的55%,偏转量高达±45°以上。这种超大副翼在低速和大攻角下仍能产生极强的滚转力矩,是3D飞行的核心。The 3D plane's oversize ailerons are its defining feature — 55% of chord depth, with throws exceeding ±45°. These massive surfaces generate tremendous roll authority even at low speed and high angle of attack, which is the heart of 3D flight.
- 从主翼后缘切下副翼,保留约2mm的铰链材料Cut the aileron from the wing trailing edge, leaving ~2mm of foam as a living hinge
- 副翼前缘(与机翼连接处)用宽透明胶带双面粘贴作为铰链Apply wide clear tape on both sides of the hinge line for a durable flexible hinge
- 在副翼中部安装铝合金舵角,用M2螺丝穿透KT板固定(不能只用胶粘)Mount alloy control horn at mid-aileron with M2 screws through the foam — glue alone is not strong enough
- 副翼后缘做削薄处理:将后缘约5mm宽度削薄至约1mm,减少气动阻力Bevel the aileron trailing edge: taper the last 5mm down to ~1mm thickness for reduced drag
- 检查副翼在±45°范围内偏转顺畅,无卡顿,回中后完全水平Verify ailerons deflect smoothly through ±45° without binding and return to perfectly neutral
💡 铰链强化💡 Hinge Reinforcement
3D飞行时副翼偏转速度极快,铰链承受很大的冲击力。建议在胶带铰链外侧再粘一层热收缩管(压缩后约15mm宽),大幅提升铰链耐久性。使用热风枪收缩时注意不要过热烫伤KT板。3D ailerons snap back and forth at high speed, putting heavy stress on hinges. Add a strip of heat-shrink tubing (~15mm wide when shrunk) over the tape hinge for dramatically improved durability. Use a heat gun carefully — too much heat will warp the KT foam.
机身箱体制作Fuselage Box Construction
机身结构 · 约80分钟Fuselage structure · ~80 min
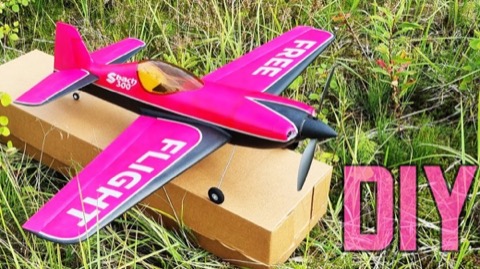
3D机身采用开放式箱形框架,而非封闭的盒形结构,以最大程度减轻重量。机身只保留受力骨架,所有非承力区域全部镂空。这种结构虽然看起来"空旷",但配合碳纤维管加强后具有优秀的扭转刚性。The 3D fuselage is an open box frame — not a closed shell — for maximum weight savings. Only the load-bearing skeleton is retained; all non-structural areas are cut away. This looks sparse but has excellent torsional stiffness once the carbon tube reinforcements are added.
- 裁切机身左右侧板(各650×80mm),在非承力区域切出大面积减重孔Cut left and right fuselage side panels (650×80mm each) with large lightening holes in non-structural areas
- 制作机头防火墙:2mm碳纤维板裁切为60×60mm,四角钻孔用于电机安装Make firewall from 2mm carbon sheet cut to 60×60mm with motor mounting holes at corners
- 机身共需5个隔框:机头、翼根前、翼根后、尾翼根、尾端,间距约130mmFive formers: nose, wing root forward, wing root rear, tail root, tail end — spaced ~130mm apart
- 用CA胶组装机身箱体,先粘隔框,再合拢两片侧板,用方角保证垂直度Assemble with CA glue: bond formers first, then close the two side panels; use a square to ensure perpendicularity
- 沿机身顶部和底部各嵌入一根6mm碳纤维管,用稀CA胶渗透固定Embed one 6mm carbon tube along the fuselage top and one along the bottom; wick thin CA to lock
- 翼根处设计可拆卸机翼插管:机翼内的碳管插入机身内的卡槽,不飞时可拆下携带Design the wing root as a plug-in joint — the wing's carbon tube inserts into a fuselage socket for easy transport
尾翼与大舵面Tail Surfaces and Large Control Surfaces
尾翼制作 · 约60分钟Tail construction · ~60 min
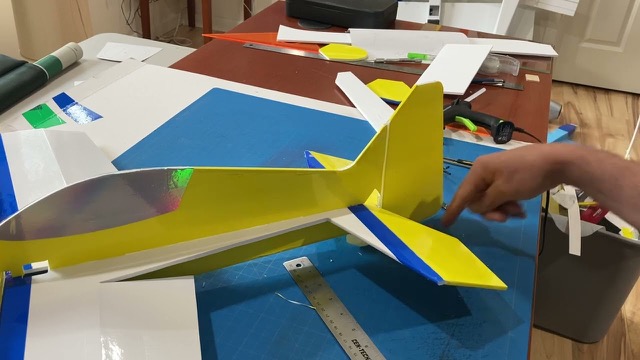
3D机的尾翼同样采用超大舵面设计。升降舵和方向舵的面积是常规飞机的2倍以上,配合大行程(±45°以上)可以在极低速甚至零速度时仍能提供足够的操控力矩,实现真正的3D动作。The 3D tail uses the same oversize philosophy. Elevator and rudder areas are 2× those of a conventional plane, and with ±45°+ throws they deliver enough control authority at near-zero airspeed for genuine 3D maneuvers.
- 水平尾翼裁切:翼展350mm,弦长120mm,升降舵占后缘60%(72mm)Horizontal tail: 350mm span, 120mm chord, elevator at 60% trailing edge (72mm deep)
- 垂直尾翼:高200mm,根弦150mm,梢弦80mm,方向舵占55%Vertical tail: 200mm height, 150mm root chord, 80mm tip chord, rudder at 55%
- 尾翼面与舵面铰链安装同副翼,使用宽胶带双面铰链+金属舵角Tail surface hinges same as ailerons — wide tape double-sided hinge + metal control horns
- 水平尾翼通过碳管插管安装在机身,可微调安装角以配平俯仰Mount horizontal tail on a carbon tube socket in the fuselage — slight incidence adjustment tunes pitch trim
- 垂直尾翼用CA胶粘合在机身后段,用直角三角形加强片固定垂直度Bond vertical tail to the rear fuselage with CA; add right-angle gussets to keep it perfectly vertical
- 方向舵偏转量设置±50mm(大于一般飞机),确保3D动作时的偏航操控力Set rudder throw at ±50mm (more than a standard aircraft) for strong yaw authority in 3D
高性能电子设备安装High-Performance Electronics Installation
电子系统 · 约70分钟Electronics · ~70 min
3D机的电子系统要求更高:大扭力舵机保证大行程下的精确控制,高功率电机系统提供超过机重2倍的推力,高放电电池满足3D飞行时的瞬间大电流需求。电子系统的重量分布同时决定了飞机的重心位置。3D electronics demand higher performance across the board: high-torque servos for precise large-throw control, a high-power motor system delivering 2×+ thrust-to-weight, and a high-discharge battery for the instantaneous peak current of 3D flight. The weight distribution of the electronics also directly determines the CG.
- 安装2212电机到防火墙:确认推力线与机身中线平行(侧推角为0,下推3°)Mount 2212 motor to firewall: ensure thrust line is parallel to fuselage centerline (0° side thrust, 3° down thrust)
- 电调用魔术贴固定在机头内部,引出散热孔,确保能承受40A持续电流Mount ESC inside the nose with Velcro near a cooling vent; ensure it can sustain 40A continuous
- 副翼舵机安装在翼面内侧,用CA胶固定舵机托盘;舵机臂设置在中立位Install aileron servos inside the wing panel on a CA-bonded tray; center the servo arm at neutral
- 升降舵舵机安装在机身前段(尽量靠近重心),连杆沿机身后延至升降舵Install elevator servo in the forward fuselage (close to CG); run pushrod rearward to elevator
- 方向舵舵机安装在机身后段靠近方向舵,缩短连杆减少游隙Mount rudder servo near the rear fuselage close to the rudder to minimize pushrod length and slop
- 所有连杆使用2mm钢丝,两端用Z型弯曲连接,避免3D飞行时大偏转导致连杆弯曲Use 2mm steel wire pushrods with Z-bends at both ends — rigid enough to handle large deflections without flexing
- 接收机绑在机身中段,用泡沫包裹防震,天线引出机身两侧Bind receiver at mid-fuselage, foam-wrapped for vibration protection; route antennas out both fuselage sides
⚠️ 舵机扭矩要求⚠️ Servo Torque Requirements
3D飞行时舵面气动载荷极大,普通9g舵机扭矩(约1.5kg·cm)不足以驱动大舵面。必须使用扭矩不低于2.5kg·cm的金属齿轮舵机(如MG90S),否则高速飞行时舵机会被气动力打回,出现严重的操控失效。Aerodynamic loads on 3D control surfaces are extreme. Standard 9g servos (~1.5 kg·cm) cannot drive oversized surfaces reliably. Use metal-gear servos rated at 2.5 kg·cm minimum (e.g., MG90S), or air loads at speed will overpower the servo and cause a total loss of control.
重心与极端行程调整CG and Extreme Throw Setup
飞行配平 · 约40分钟Flight trim · ~40 min
3D机的重心调整和遥控器设置与普通飞机截然不同。为了实现3D飞行,重心位置比普通飞机更偏后,舵面行程也比普通飞机大2-3倍。这些设置使飞机具有更强的机动性,但同时也降低了飞行稳定性,需要飞手更精准的操控。3D aircraft CG and radio setup differs dramatically from a normal plane. The CG sits further aft for increased agility, and throws are 2–3× those of a normal aircraft. This gives extreme maneuverability at the cost of stability — the pilot must compensate with more precise inputs.
- 重心位置:翼弦28-33%处(比教练机的25%更靠后),首飞建议28%偏保守CG position: 28–33% of chord (further aft than a trainer's 25%); use 28% for maiden flights
- 正常飞行模式(Normal Mode)行程设置:副翼±20mm,升降舵±18mm,方向舵±25mmNormal mode throws: aileron ±20mm, elevator ±18mm, rudder ±25mm
- 3D飞行模式行程设置:副翼±45mm,升降舵±45mm,方向舵±50mm3D mode throws: aileron ±45mm, elevator ±45mm, rudder ±50mm
- 在遥控器上设置双速率(Dual Rate):模式开关切换正常/3D模式Set up dual rates on the transmitter: toggle switch between normal and 3D mode
- 指数(Expo)设置:正常模式30-40%,3D模式50-60%,减少中性附近的操控灵敏度Expo settings: normal mode 30–40%, 3D mode 50–60%, to soften control sensitivity around neutral
- 油门曲线:3D模式建议设置油门中点对应50%实际输出,方便悬停操控Throttle curve: in 3D mode set mid-stick to 50% actual output for easier hover throttle management
地面测试Ground Testing
全面测试 · 约30分钟Full testing · ~30 min
3D机地面测试必须比普通飞机更为严格彻底。由于飞机结构更轻薄、舵面更大,任何小问题在空中都可能被放大,导致摔机。花时间做好地面测试,远比修理摔坏的飞机更划算。3D aircraft ground testing must be more thorough than for a normal plane. The lighter structure and larger control surfaces amplify any small problem in the air, leading to crashes. Time spent on ground testing is always cheaper than repairing a crashed aircraft.
- 舵面方向检查:正舵→副翼向右偏、升降舵向上、方向舵向右Control direction check: right stick → aileron right, up stick → elevator up, right pedal → rudder right
- 全行程偏转测试:每个舵面正负全行程偏转10次,确认无卡顿和异响Full-throw test: cycle each surface 10 times through full throw, no binding or noise
- 摘下螺旋桨,全油门测试电机:持续3秒,听电调是否有保护音Remove prop, full-throttle test motor for 3 seconds — listen for ESC protection beeps
- 装上螺旋桨,手持飞机验证推力方向:推力应正向朝前,无明显侧偏Install prop, hold aircraft and verify thrust direction: must push straight forward with no significant side component
- 最终重心复查:安装电池后重新测量,确认在设计范围内Final CG check: re-measure with battery installed; confirm within design range
- 所有连接处拉力测试:用力拉扯机翼、尾翼,确认粘合牢固不松动Pull-test all joints: tug firmly on the wing and tail surfaces to confirm all bonds are solid
⚠️ 安全警告⚠️ Safety Warning
3D机使用大直径螺旋桨(8英寸以上)和高功率电机,旋转时产生的动能极大,伤害力远超小型教练机。测试时务必摘除螺旋桨,装桨后务必使机头朝向无人区域,身边人必须站在飞机后方。3D planes use large-diameter propellers (8"+) and high-power motors — the kinetic energy when spinning is enormous, far more dangerous than a small trainer. ALWAYS remove the prop during bench testing. When testing with the prop on, always point the nose toward a clear area and keep all bystanders behind the aircraft.
3D飞行入门技巧Introduction to 3D Flight Techniques
飞行技术 · 持续练习Flight skills · Ongoing practice
恭喜完成3D特技机的制作!3D飞行技术的学习是一段漫长但令人着迷的旅程。建议从最基础的3D动作开始练习,逐步进阶到更复杂的组合动作,切勿贪快跳过基础阶段。在飞行前请务必在模拟器上充分练习。Congratulations on completing your 3D aerobatic build! Learning 3D flight is a long and fascinating journey. Start with the most fundamental 3D maneuvers and progress gradually — don't rush past the basics. Always practice extensively on a simulator before attempting each new maneuver.
- 哈里尔飞行(Harrier):大攻角(约60°)低速平飞,油门约50-60%,副翼/升降舵保持飞机姿态稳定Harrier flight: high angle of attack (~60°) slow level flight at 50–60% throttle; aileron/elevator maintain attitude
- 垂直悬停(Hover):机头朝上垂直悬停,油门70-80%,靠方向舵控制旋转,副翼和升降舵保持位置Hover: nose-straight-up stationary hover at 70–80% throttle; rudder controls rotation, aileron/elevator hold position
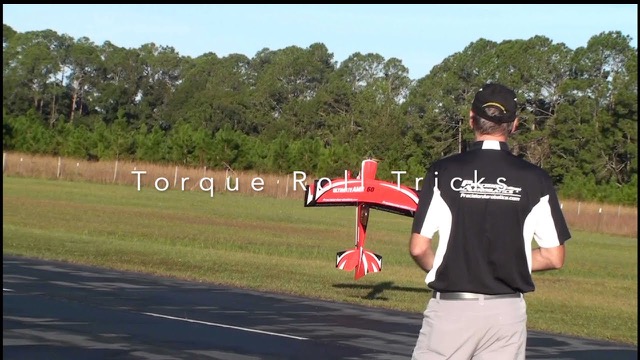
- 尾冲(Torque Roll):垂直悬停时收小油门,飞机绕推力轴自旋,通过精细油门和方向舵控制Torque roll: reduce throttle in hover and let the plane spin on its thrust axis; control with fine throttle and rudder
- 无动力悬停(Dead Stick Hover):最终目标,油门为零时仍能保持机头向上悬停数秒Dead-stick hover: the ultimate goal — maintain nose-up hover for several seconds at zero throttle
- 每次飞行前进行模拟器练习,Realflight、Phoenix RC、VelociDrone均有KT板3D机模型Practice on a simulator before each flying session — RealFlight, Phoenix RC, and VelociDrone all have KT foam 3D models
🎉 恭喜完成!🎉 Congratulations!
您已完成了KT特技飞行系列教程的全部三个机型!从入门教练机到三角飞翼,再到3D特技机,每一步都代表着飞行技术的进步。继续保持热情,在天空中探索属于您的飞行乐趣!You've completed all three aircraft in the KT Acro Flight tutorial series — from beginner trainer to delta wing to full 3D aerobatic. Each step represents real growth in your flying skills. Keep the passion alive and keep exploring the sky!